I'll post more later on my ideas, I'm a little rushed at the moment. Ciao.
Monday, December 29, 2014
Vector GUI Concept for Vector Applications
I came up with a concept for how I might make an application made for creating vector art and animations, but where the GUI itself is also vectoral. This idea was derived from FlowStone.
I'll post more later on my ideas, I'm a little rushed at the moment. Ciao.
Thursday, December 11, 2014
Vector Smears (Take 3 - Huzzah!)
I realized I'd been looking at this problem kind of wrong, so after a bit of rework, I finally got a sweet, anime smear (or motion blur) effect.
Anime Smear (Still)
Anime Smear (Moving)
As always, I'll post more updates as things happen.
Tuesday, December 9, 2014
Vector Smears (Take 2)
So after a little bit more work, I've managed to get the smear effect to look a bit better. It still needs a little work, but I'm getting really close now.
Smear (30fps)
Smear (4fps)
I need to figure out how to make the artifacts that occur when the shape flips inside-out stop happening. My best bet is to figure out which points in time the velocity of the object changes dramatically enough to cause such a problem. I'll need to do more testing.
Monday, December 8, 2014
Vector Smears (Take 1)
As a side project, I decided to look into doing algorithmic smear effects. Smears are done in older cartoons, mostly because transparency is difficult when using paint. There's an imgur album full of stuff regarding this topic, you should go check it out first.
As a concept, smears are made by making parts of a body appear to be at different points in time, and that point in time is generally based on what's closest to the "front" of the motion and what's closest to the "rear" of the motion. Using this concept, I've built a simple prototype:
Path:
Smear (1x):
Smear (2x):
Smear (3x):
Smear (5x):
Smear (10x):
Smear (25x):
It would seem that my algorithm needs a little work, although it's not too far off. I just need to take into account volumetric smearing next.
First PyCairo Test
So I did a little more research on PyCairo this morning. It turns out that the requirements for using it with pygame are really simple - you only really need PyCairo, numpy (or numeric, whatever), and pygame installed. There was even a section in the pygame.org site dedicated to this exact thing.
EDIT: Oh yeah, I also discovered that InkScape uses Cairo! Neat!
EDIT: Oh, yeah, also Cairo has built-in masking stuff, so I won't need to use my slow-ass algorithm anymore :D
As a quick test, I took the old outline program and created a duplicate version for testing out PyCairo.
You can see that the antialiasing is absolutely superb! However, it seems that rendering a scene using an immediate mode algorithm creates some small problems... you might have noticed that there's some artifacts that appeared between the curves and their miter joint; that is the result of the separate shapes being rendered independently, one at a time. When doing this, the library doesn't have any way of knowing that there's two shapes connecting where the gap forms, so it just does antialiasing of the individual shapes, which in the end creates those gaps.
The proper way to deal with this is to create a scene using a retained mode algorithm and then use multisampling to render the entire scene. I don't know yet it Cairo can do retained mode rendering, but in the event that it can't I'll have to find a work-around so these gaps don't become a problem.
EDIT: Oh yeah, I also discovered that InkScape uses Cairo! Neat!
EDIT: Oh, yeah, also Cairo has built-in masking stuff, so I won't need to use my slow-ass algorithm anymore :D
As a quick test, I took the old outline program and created a duplicate version for testing out PyCairo.
So here's what the outline looks like WITHOUT PyCairo:
...and here's what it looks like WITH PyCairo:
You can see that the antialiasing is absolutely superb! However, it seems that rendering a scene using an immediate mode algorithm creates some small problems... you might have noticed that there's some artifacts that appeared between the curves and their miter joint; that is the result of the separate shapes being rendered independently, one at a time. When doing this, the library doesn't have any way of knowing that there's two shapes connecting where the gap forms, so it just does antialiasing of the individual shapes, which in the end creates those gaps.
The proper way to deal with this is to create a scene using a retained mode algorithm and then use multisampling to render the entire scene. I don't know yet it Cairo can do retained mode rendering, but in the event that it can't I'll have to find a work-around so these gaps don't become a problem.
Saturday, December 6, 2014
PyCairo
So I discovered a pretty nice graphics library called Cairo just today, and apparently not only does it have support for Python (PyCairo), but it also works with Pygame! Hell yeah!
What's nice about this library is that it has really nice gradients, everything is beautifully antialiased, and best of all... it's fast. Check it out, I found an image online of what the library is capable of doing:
I'm really looking forward to using this library.
Monday, September 22, 2014
Expression Interpilation - The Mouth
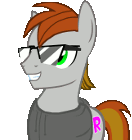
One of the hardest things I'll need to tackle is figuring out a way to do expressions. Now, I could just make a whole bunch of presets, but that's not the way I like to do things. Instead, I'd like to come up with an algorithmic way to create expressions.
Focusing on the mouth, two things immediately come to mind: the first is that the muzzle changes shape depending on if the mouth is opened or not.
The second thing is that the mouth seems to work independently from the muzzle, especially while the mouth is close - it almost appears to be superimposed when the mouth isn't opened.
Alright, well let's look at the curves needed to create both mouths, starting with the closed mouth:

You can see that the curve that makes the mouth is completely independent to the curve that makes the muzzle. It's also worth pointing out that the mouth only needs a 3 point bézier curve (two end points and 1 control point) instead of the standard 4 point bézier (two end points and 2 control points).
Now let's compare this to the curves of the open mouth:
Instead of having two separate curves, we have one line made of several curves - 4 to be exact. This is 2 more than when the mouth is closed. The good news is that some things haven't changed at all - the end points and their respective control points for the curve that makes the muzzle are unchanged. Also, the end point of the curve that's at the corner of the mouth still doesn't have any control points. However, it would seem that there's now two curves that make up the mouth instead of just one, and one of them has an end point that has collinear control points (which is why the top of the mouth is curved instead of a sharp corner like the bottom).
Ok, so in order to create both shapes, we have to satisfy the minimum requirements of either. This means we'll likely end up with a less optimal shape. That would be obvious in the case when the mouth is closed, since it usually requires 2 curves total. So let's come up with a case where we can create the shape of the closed mouth using 4 curves:
In a sense, this is the same as the example with only 2 curves - the curves that make up the mouth are identical - they might as well be one curve. Everything else pretty much remains unchanged between when the mouth is close and when the mouth is opened... EXCEPT the corner that makes up the top-front of the mouth!
Look at the curves for when the mouth is opened...


Do you see how the control points are collinear for that one corner, making the top part of the mouth a smooth curve? Compare that to what we just made and you'll see that corner's control points AREN'T collinear when the mouth is closed, which makes it a sharp corner. Do you know what that means? It means we have to interpolate that corner when transitioning between a closed mouth and an open one!
Let's play pretend for a moment - let's say we have a slider called "muzzle-mouth curve" that is used to go between a closed mouth and an open one. When the slider is set to 0 we get the closed mouth shape, and when it's set to 1 we get the open mouth shape. Between the two shapes it would create, we already know what it would look like when it's set to 0. In order to get the other shape, we'd have to make the control point of that one corner (the one that determines the curve of the top-most part of the muzzle) move around until it's collinear with the other control point for that corner. That would look like this:
(I admit, I accidentally moved some other control points too, but ignore that.)
You can see that the top part of the mouth, despite the mouth being closed, now looks rounded. The two identical curves on the inside of the mouth remain unchanged, but we've still managed to get that smooth upper-mouth we need when a character has their mouth opened!
There! We've taken the first steps needed for doing interpolated expressions!
I'm Not Dead
Hi!
It's been a while since I've posted, so here's my way of letting you know two things:
Instead of doing more with layering, since layers are just a huge pain in the ass, I'll be making a post on my thoughts about how one would use my system to interpolate between all the many complicated facial expressions that the characters of the show express. To start off with, I'd like to go back to the mouth and muzzle - instead of having pre-made shapes, I'd like to come up with an algorithmic way to create the mouth which would involve sliders.
I'll be posting more about it soon!
It's been a while since I've posted, so here's my way of letting you know two things:
- I'm not dead.
- Neither is this project.
Instead of doing more with layering, since layers are just a huge pain in the ass, I'll be making a post on my thoughts about how one would use my system to interpolate between all the many complicated facial expressions that the characters of the show express. To start off with, I'd like to go back to the mouth and muzzle - instead of having pre-made shapes, I'd like to come up with an algorithmic way to create the mouth which would involve sliders.
I'll be posting more about it soon!
Tuesday, August 12, 2014
Eyes Test 3
Alright, I've been struggling with figuring out how I'm going to do layers... I decided I'd take a break from that and focus on 3D stuff. By applying transformations to a 4x4 Matrix (and then casting it to a 3x3 Matrix), I can use it to give the impression that a shape exists in a 3D space.
Oh yeah, I also added in some code for doing gradients. Anyways, I've at least got those things out of the way, so I'll be focusing again on doing layers....ugh.
Friday, August 8, 2014
Layering - a Work In Progress
Hi!
Today I decided I needed to focus on doing proper, optimized layering, but unfortunately it's complicated enough that I feel I need to make sure I have everything written in stone before actually trying to do layering myself. For that reason, I've started a document describing my thoughts and ideas for how I might (and will) go through getting layering to work. It is a WIP, so you might actually catch me working on it in real-time.
Click here to view the document.
I also suspect this will take several days to get in order, which is why I'm posting now as apposed to later when I've finished everything. That way, you can keep an eye on my progress.
Thursday, August 7, 2014
Putting it all together - Eye Test 2
This is the result of everything I've done today. Hot dog, I got a LOT of stuff done today.
I still have a lot of work to do in order for this to be efficient and working properly. It might be necessary for me to do 3D vectors and 4x4 Matrices as well to get things like this eye test to work right, but THAT'LL BE FOR ANOTHER DAY, MKAY?
Parenting
Wow, I never thought I'd post this much stuff in one day.
I've whipped up a class called Entity that serves to contain shapes and other entities. It manages it's own attributes, such as rotation, shear, scale, etc... and can "recursively" draw to the screen in a layered manner similar to how Flash might.
I did a simple test where there's only two entities.
- The first entity only contains a red shape
- The second entity contains a hollow box, the first entity, and a green shape
Masking - Take 2
Ok, I found a solution. My solution is to type-cast the masked layer's alpha array to contain values of type <type 'numpy.uint16'> instead of <type 'numpy.uint8'>, which allows me to multiply the values of the two alpha arrays without worrying about modulation since 255*255 (the largest value this could possibly produce) isn't bigger than nor equal to 2^16. I then divide the resulting product-array by the value 255, and then finally assign it to the alpha values in the masked layer.
masked_alpha = pygame.surfarray.pixels_alpha(self.output_layer)
mask_alpha = pygame.surfarray.pixels_alpha(self.mask_layer)
new_masked_alpha = numpy.uint16(masked_alpha)
new_masked_alpha *= mask_alpha
new_masked_alpha /= 255
masked_alpha *= 0
masked_alpha += new_masked_alpha
del new_masked_alpha
del masked_alpha
del mask_alpha
The result is beautiful.
The only complaint that I have about using this method is that since I have to type-cast the one array, the values have to be copied over instead of referenced, which can be SLOW. Even so, I'm very happy with this result since it performs perfectly and is relatively fast.
Masking - Take 1 Analysis
Alright, so I figured out the issue with the first solution. The problem is the values are of type <type 'numpy.uint8'>. What's special about these values is that they're modulated by 2^8, meaning the values wrap around whenever they get larger than 255 or less than 0.
I'll have to figure out a way to get around this issue.
Masking - Take 1
Good morning!
Today I'd like to focus on doing masking. Masking is, by definition, applying the alpha of one image multiplicity to the alpha of another image. To explain this simply, it just means that an additional layer of alpha is applied to an image (even if that image already has an alpha channel), and will only allow that image to show through wherever the alpha is greater than 0 on the mask.
I've already whipped up an example, which I was surprised to find was much simpler than I had expected. As it turns out, the guys who work on Pygame recently added a feature to the surfarray sub-module to allow users to directly reference the alpha pixels of a surface in the form of an array. This is an extremely fast operation since it's merely referencing the alpha values rather than copying them. The fact that they're being referenced is also very useful since any changes done to the values in that array immediately show on the surface.
What I've done is generated the alpha-arrays for both the masked layer and the masking layer and multiplied the masking layer's alpha-array to the masked-layer's alpha array. I then made sure to delete those arrays, since the surfaces remain locked as long as those arrays exist.
masked_alpha = pygame.surfarray.pixels_alpha(self.output_layer)
mask_alpha = pygame.surfarray.pixels_alpha(self.mask_layer)
masked_alpha *= mask_alpha
del masked_alpha
del mask_alpha
The result is shown in the image below. The order is masked layer, masking layer, output layer.
For the most part, this does the job as described, but if you look carefully you can see that there's some strange artifacts showing up in the output layer. It's really unfortunate that those are showing up, since this solution is near perfect for what I am doing. Unfortunately, those stupid artifacts are reason enough to look for another solution (or simply a fix to this existing solution), which is why this post is titled "Take 1." I'll see what I can figure out.
Wednesday, August 6, 2014
Matrices
Hi guys. Yeah sorry, I know it's been a while since my last update but I've been busy with life stuff...
Today I focused on learning about matrices and how they're freaking awesome for vector graphics because you can do all your transformations to the matrix first before applying it to a shape. This means you'd only need to do ONE transformation calculation per point, as compared to doing each transformation one at a time for every single point (which can be costly when there's a lot of points and a lot of transformations).
Here's a little animation I threw together where I manipulate a shape using a matrix.
This is also really nice for doing cumulative transformations on children of parent entities - a topic which will be relevant in the near future. We'd only need to pass down the resultant transformation matrix from the parent to the child when calculating the new shape the child would form after the transformations are applied. This way, any transformations done to the parent will directly affect the child as well.
Wednesday, July 23, 2014
Headbob
I created a simple animation today using some of the tools I've created for this application. Some of this is prerendered .pngs, but some of it isn't. Can you guess which parts is which?
Saturday, July 19, 2014
Miter Joint
Good noon!
I decided it's better to draw each curve's outline separately rather than together as one giant polygon. This fixed some of the inside-out holes that were appearing in the mouth test from yesterday. Because of this, I am also restricting myself to calculating and drawing the outlines of corners separately as well. This works great for convex corners! Check it out:
I'm emulating the Miter Joint from this article which basically tries to create a sharp corner or otherwise creates a squared corner if the sharp part would exceed the Miter Limit, which is defined by the user. What's cool is I can also use these points that are being calculated for these corners to create another bezier curve, meaning I can make rounded corners if I want to.
Now the tricky part is going to be figuring out how to do concave corners. I have to make it so the two curves that share that corner don't render in parts that exist past the opposite curve's boundary. I have no clue where to start with this, but I'll keep it in mind for later.
Friday, July 18, 2014
Mouth... oops!
Today I tried focusing on how to combine primitives. I don't believe I've mentioned about primitives before, but a primitive is a shape composed of a list of points and a list of curves that may or may not be closed. Right now I have a primitive for the shape of the mouth, the head, and the shape of the muzzle.
I've loaded all three of these into a test application and did some complicated math stuff to combine both the mouth primitive and the muzzle primitive into one shape (after modifying them as needed). It was way trickier than I had expected - it isn't user-friendly in the slightest. Not to mention, I now have another problem to deal with - how to fix this terrible looking outline.
This combination technique needs a lot of work. I suspect the easiest thing to do is to use a skew transformations to simplify some of the stuff I did to create this mouth moving effect. After that, I'll need to find a way to fix the outline, probably doing some jointed corners, but I'm not sure yet.
EDIT: Actually, I think they may be using masking techniques to create the gap where the mouth is. The mouth is likely not even connected to the muzzle at all. I'll have to figure something else out to get that to work.
Thursday, July 17, 2014
Paintpath
Today I tested out some ideas for how certain
outlines are created, specifically the type that follows a bezier curve
and only shows on one side of it. Here's a picture.
Now this is only one type of outline that is used in the show. I still need to create a version of this for the cases when sharp corners exist (jointed corners).
First Post!
Hello!
Ok, so to start off, I'd like to mention that I never know if I'll actually finish this project. In truth, I rarely finish anything since I often get sidetracked with life or ideas for other projects. That being said, if you really REALLY want this application to be finished, please message me (but don't email me 'cause I never check my email). I'm sadly so ADHD that I sometimes need other people's help to push me back in the right direction.
So at this point in development, I will not be working on the editor itself first. Instead, I'm going to create simple, stand-alone experimental test first, testing out each individual part that will need to be eventually added to the editor in the end. The reason I'm doing this is because I'm not sure yet what all I'll need in the editor, nor how I'll want to structure it.
So for now, enjoy the frequent posts on the tests I'll be working on.
Subscribe to:
Posts (Atom)